FROM THE AUTHOR: If you disagree, keep it kosher. We’re just talking guitars.
If you’re like me, you would love to spend more time playing guitar.
Or at least you’d like to figure out how to be more productive with the time you already spend. Because even if you get to play sporadically, it doesn’t always feel like you’re accomplishing anything.
It’s possible that you’re not.
For most, the tendency when picking up the guitar is to “fiddle” or jam whatever song is in our heads. We seldom tackle the instrument with intentionality and aggression, unless we have a lot of time to play.
The problem is, we usually don’t have more than 15 or 20 minutes.
So I’ll show you how to make the most of that time—and to improve—even if you don’t have hours to spare.
We’ll cover four specific practice methods you can use to improve your guitar playing. And none of them take much time.
1. Play Through a Loose-Fitting Pentatonic Scale
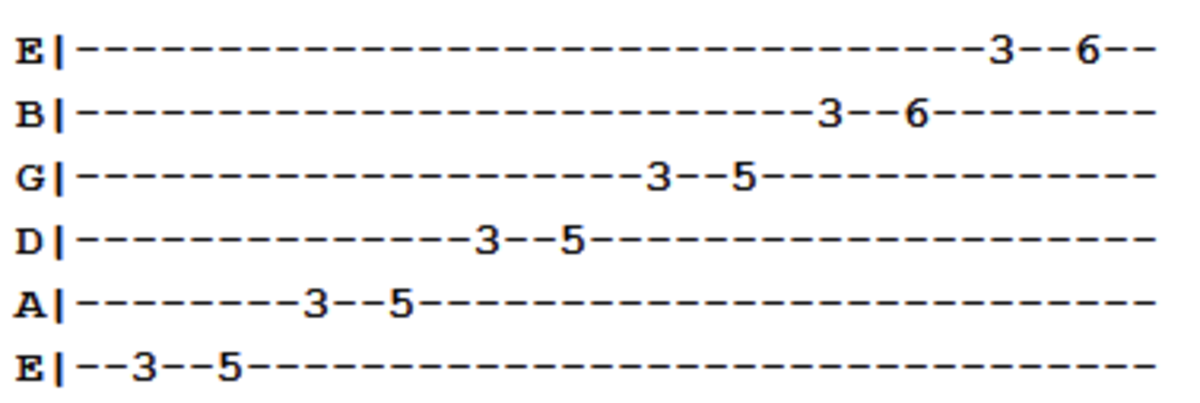
First up is what I’m calling the “loose-fitting pentatonic scale.” That means we’re looking to practice the general pentatonic shape or sound, which should be familiar to you. Here’s the structure:

This shape is what many blues and rock lead patterns are derived from. Learn it, then practice your own variations for five or ten minutes at a time.
Perhaps something like this:

Change keys, use different techniques or just work on your speed. The better you are at improvising and navigating this shape, the better your foundational lead play will be.
And the details don’t matter as much. As long as you’re practicing the shape, you’re doing something worthwhile and substantive.
2. Target an Uncomfortable Chord Shape
Find a chord shape that doesn’t come naturally to you. By that I mean that you can’t just pop to it without thinking; it’s difficult and awkward. For me, that shape has always been anything where my pinky plays the deep root note.

The plan is to simply work on it, and that can look however you want. Practice going in and out of that chord, moving the shape or work on picking through it in an arpeggiated pattern.
It’ll be tough, because chances are you haven’t bothered much with a shape that gives you a lot of trouble.
But if you work on it intentionally, even for a few minutes, it’ll be easier the next time around. You’ll have improved dexterity, finger strength and—over time—added another layer to your rhythm playing.
3. Actually Track a Solo
Tracking a solo is tedious, though not as time consuming as you might think. Pick a solo that has some complexity to it—something that will challenge you—that you wouldn’t expect to come easy.
Then, look up the tabs (I recommend printing them out) and take a small portion of the solo every day.
Let’s say the solo lasts for 16 measures.
Take two measures per day. In just over a week, you’ll know the solo and you’ll have played a lot of lead patterns that you’re not used to.
Our hands and fingers fall into what I’ll call “lead ruts” where we gravitate to certain patterns and movements and get into the habit of playing them most of the time.
Tracking solos help us break out of those ruts by playing patterns and runs that we’re not used to.
It’s a win-win.
4. Memorize the Sound of a Common Chord Progression Interval
If you want to be a better ear player and perhaps free yourself from looking at chord sheets, learning to recognize (by ear) common chord progression intervals is a huge step in the right direction.
First, consider that most of the chord progressions we use in the west are the same.
Take G, C and D for example. You use it all the time, and if you can remember how it sounds then you’ll establish auditory familiarity that will help you anticipate chord changes and free you from always looking at sheet music.
So how do you do it?
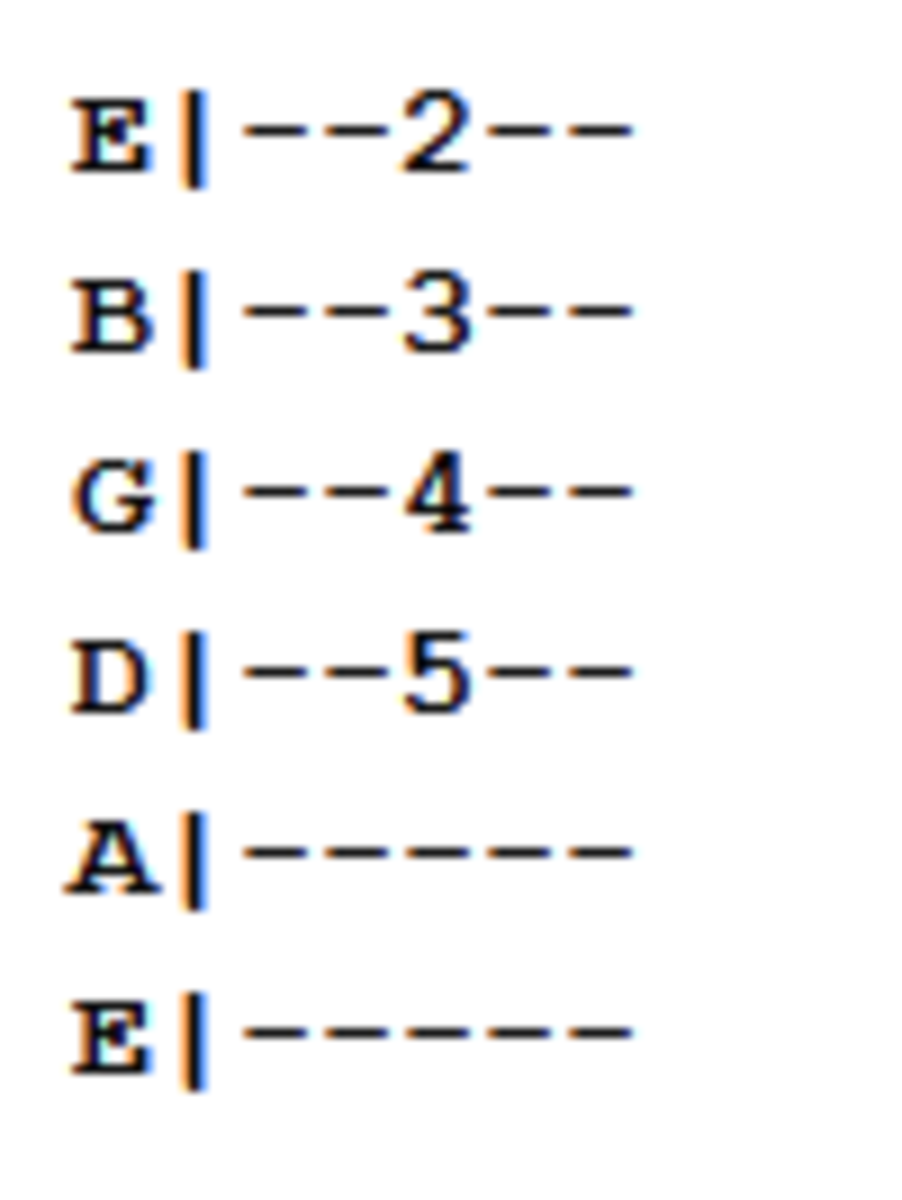
Note that what you’re actually memorizing is a series of intervals between the roots of the chords. And the location of those intervals can change; for example:

This interval and the following interval are exactly the same, because they share the same root notes.

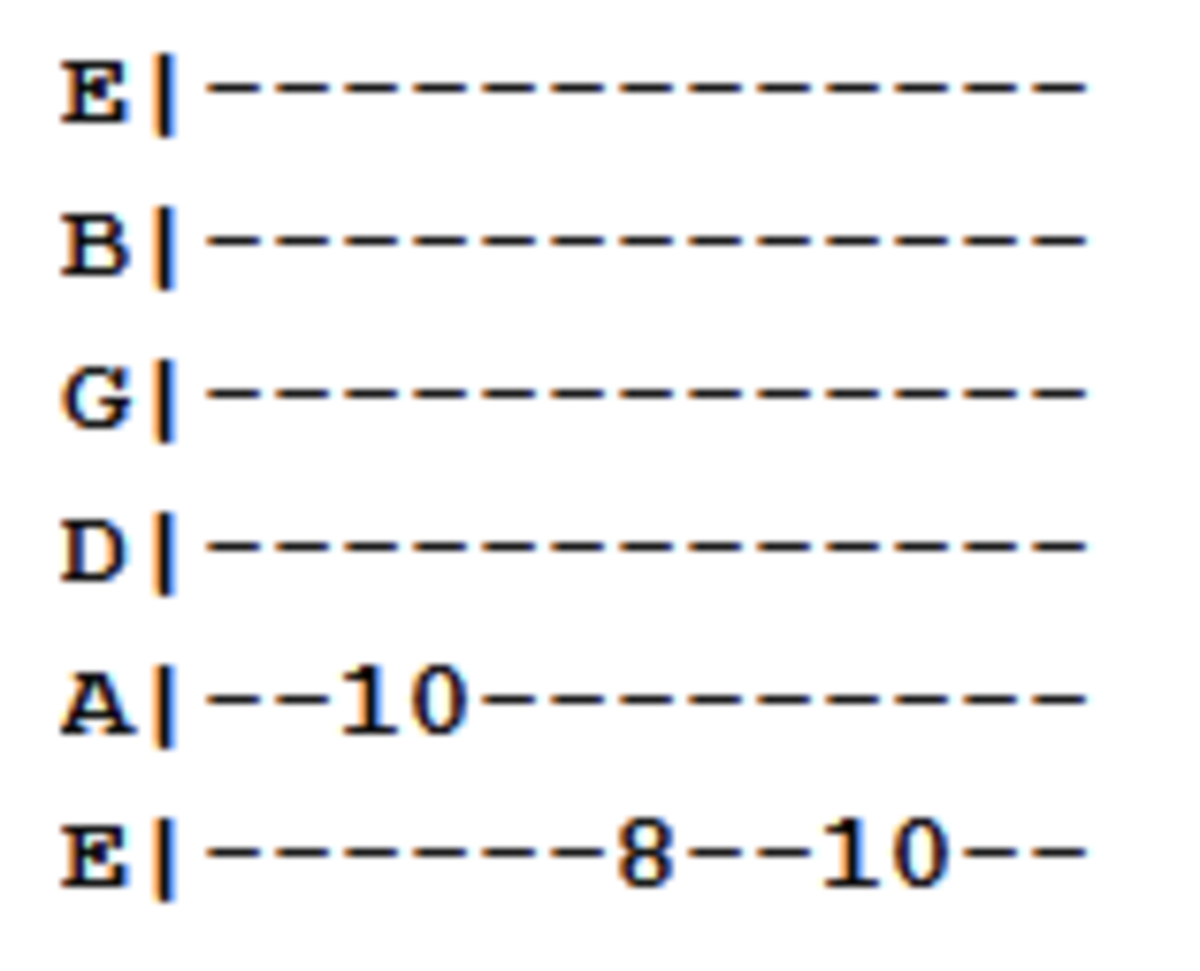
However, keep in mind we’re talking about intervals which means the root intervals of a chord progression can move. In that case, you’ll have new chords, but the intervals between them will be the same.
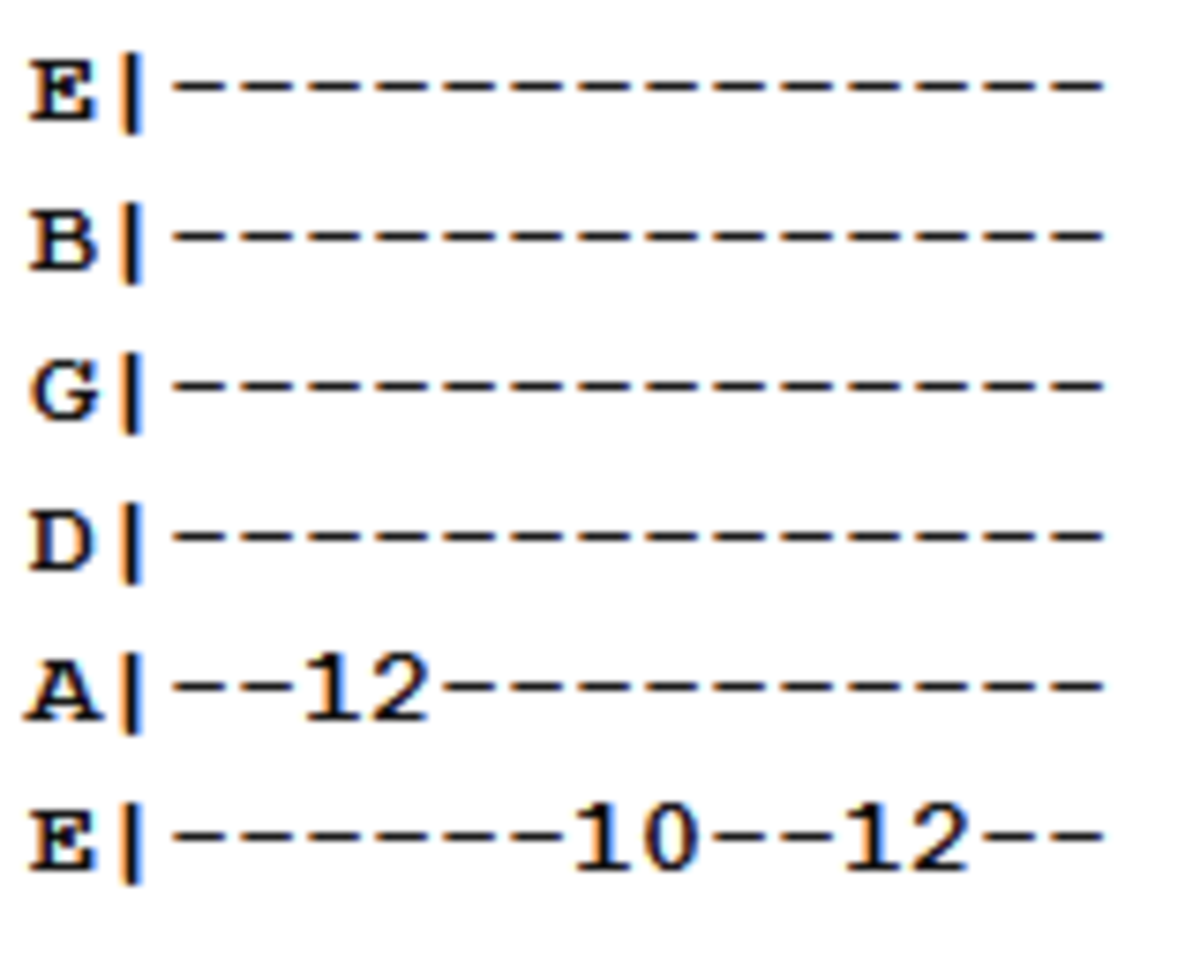
Let’s say we move the previous shape up one whole step (two frets). We’d have the following tab:

At this point, our chord progression has changed to A, D and E, yet our interval is still the same.
So it’s helpful to train our minds, not just to a specific chord progressions, but to the intervals that separate those progressions.
This article on recurring patterns in chord progressions delves a little deeper into this topic.
If you take one progression at a time and familiarize yourself with the sounds of the root notes, it won’t take more than 10-15 minutes a day to make substantial progress in this area. Here are the steps you’ll want to take:
1. Choose a common chord progression to start working with.
2. Play through the most conventional form you know (usually open chords) and pay close attention to what it sounds like, while familiarizing yourself with the chord changes.
3. Then play through just the root notes and remember the intervals between each one.
4. Now, move the progression to a new set of roots and continue to focus on the changes between each interval.
5. Repeat this process for several days, until you can easily recognize the progressions and intervals.
Follow Up
Have thoughts or questions about this lesson? Leave it in the comments or get in touch via Facebook and Twitter.
Flickr Commons Image Courtesy of Kmeron
Robert Kittleberger is the founder and editor of Guitar Chalk and Guitar Bargain. You can get in touch with him here, or via Twitter, Facebook and Google Plus.